
Nothing stops the day faster than pressing the power button and seeing a blank screen staring back. When the computer turns on but shows nothing, it can feel like everything has suddenly come to a halt. The good news is that this problem almost always has a fix that doesn’t require panic—or a new computer.
A computer screen usually won’t show a picture because of connection issues, hardware faults such as loose RAM or a failing graphics card, or software errors related to BIOS or driver corruption. Checking the power supply, cable connections, and display input source often solves the problem right away. If not, the cause may lie deeper in the hardware or system settings.
The rest of this guide walks through quick checks you can do at home, from inspecting power and cables to testing other monitors. It also explores deeper fixes like addressing hardware issues, dealing with BIOS and driver settings, and knowing when to call for professional help. Each step builds confidence so anyone can bring their screen back to life without stress.
Quick Checks: Power, Cables, and Input Sources
Most display problems start with simple issues—like unplugged cords, switched inputs, or a loose power connection. Before opening the computer or calling support, checking these basics can often bring the screen back to life fast.
Check Power Button and Power Cables
Even experienced users sometimes miss this easy step. Make sure both the computer and monitor power buttons are on and properly lit. Many monitors, such as an Alienware monitor, use small LED indicators near the power button—white or blue means it’s on, orange or off means there’s a problem with power.
Check the power cable going to the monitor and the one connecting the computer’s power supply. Wiggle each plug gently to feel for looseness. If the monitor uses a removable adapter, make sure the brick is secure and warm—not hot—when plugged in.
A quick table can help verify things:
| Check Item | What to Look For | Possible Fix |
|---|---|---|
| Power button light | Off or dim | Press button firmly or hold for 3 seconds |
| Power cable | Loose or frayed | Reseat or replace cable |
| Wall socket | No power | Switch outlets or reset surge protector |
Tiny things—like a slightly unplugged cable—cause most display issues. Once power is stable, move on to testing outlets and cables.
Test with Another Power Outlet or Cable
If the monitor still stays dark, plug it into another outlet. Power strips, especially older ones, sometimes fail silently. A new outlet rules out power delivery problems.
When possible, swap in another power cable from a known working device. Cheap or bent cables fail internally more often than expected. A quick cable swap is cheaper than assuming the monitor’s dead.
If the screen powers on with a new cable or different outlet, the issue likely came from a faulty cable or weak surge protector. Keep that bad piece aside, clearly marked. It can save confusion later if the issue returns.
For stubborn power issues, look at the monitor’s behavior—does the LED flash briefly? That hint shows it’s getting some power, but not enough to start fully.
Inspect Video Cable and Connection Type
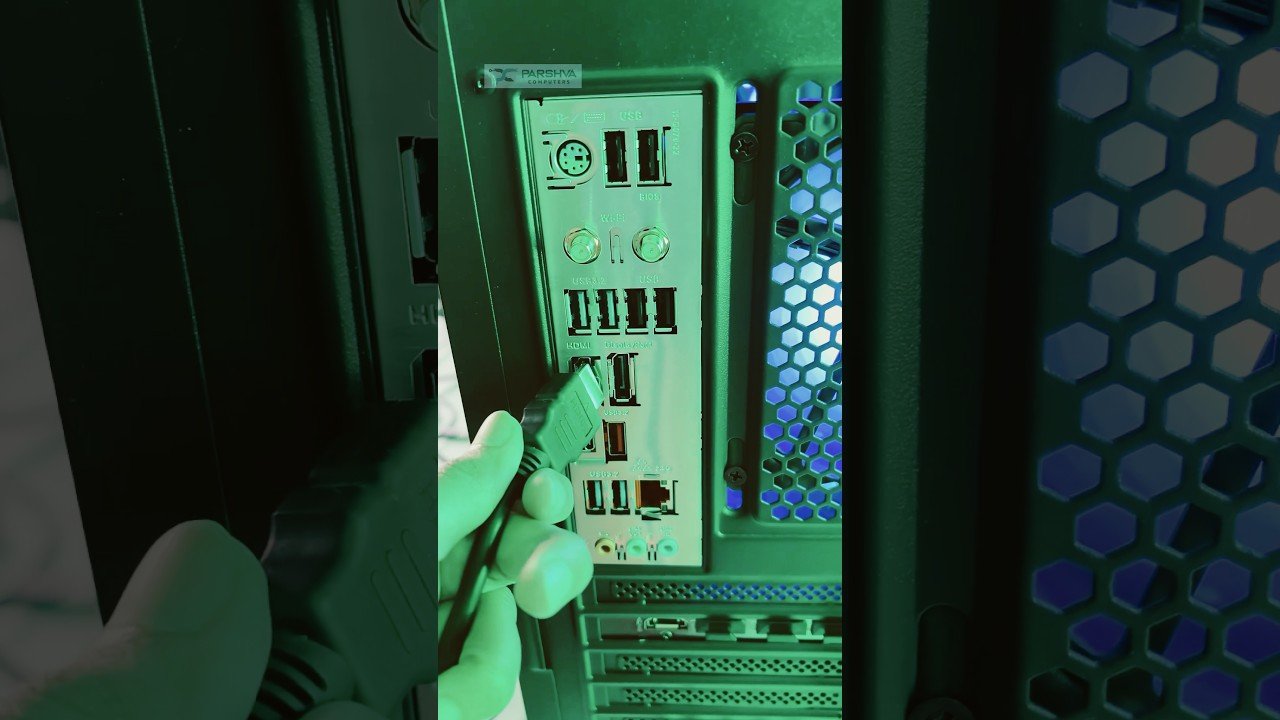
When the monitor turns on but shows “No Signal,” check both ends of your video cable. HDMI, DisplayPort, and VGA cables each have different connectors that must sit firmly in place. Loose connections or damaged pins mean the signal can’t reach the monitor.
Unplug and reinsert the cable at both ends. Make sure the HDMI port or DisplayPort isn’t dusty or bent. If your monitor and graphics card both support multiple video inputs, test each one to find a working port. Modern cards often disable some ports when multiple displays are connected.
Many users fix the issue just by swapping cables. HDMI and DisplayPort cables wear out faster than you’d think—especially if cables bend sharply behind a desk. You can read more about checking cable connections in guides like How to Fix Monitor No Signal Issue (2025 Tips).
Select the Correct Input Source and Monitor Settings
Some monitors, especially ones with several ports, don’t automatically switch to the right input. Open the monitor settings using the on-screen menu and select the correct input source—for example, HDMI, DisplayPort, or VGA.
Common error: connecting the computer through HDMI but leaving the monitor set to DisplayPort. When that happens, the screen shows “No Signal” even though everything is connected correctly.
Follow these steps to confirm:
- Press the Menu button on the monitor.
- Navigate to Input Source or Signal Source.
- Choose the port that matches your connection type.
This small step fixes many “blank screen” reports. Restart both the computer and monitor after changing settings. If the image still doesn’t appear, the problem may involve the graphics card rather than the monitor. For more details on adjusting inputs and monitor settings, see Computer Turns On But Monitor Says No Signal (9 Ways To Fix).
Testing with Other Devices and External Monitors

When a screen stays blank, testing other devices helps figure out whether the issue comes from the computer, cable, or the display itself. Switching inputs or using a second monitor often points directly to what’s wrong, saving time and frustration.
Try an External Monitor or TV
Connecting the computer to an external monitor or a TV can reveal whether the computer is still outputting video. Use a known-working HDMI port, DisplayPort, or VGA cable. If the external display works but the laptop screen stays dark, the problem likely lies in the internal display or its connection.
To keep things simple, most people can follow this checklist:
| Step | Action | What It Tells You |
|---|---|---|
| 1 | Plug the computer into another monitor or TV | Checks if video signal works |
| 2 | Switch inputs on the external monitor | Ensures the correct source is active |
| 3 | Wait a few seconds | Some monitors take time to detect input |
| 4 | Look for “Input Not Found” or similar message | Means the device isn’t sending video |
If the external monitor also shows nothing, it might be a deeper hardware or graphics card issue. Users can also make Windows “detect” another screen by right-clicking the desktop, choosing Display Settings, then selecting Detect, as explained in this TechWiser guide.
Swap Video Cables and Ports
Cables and ports age just like other hardware. A loose or damaged wire can easily cause a blank screen or “no signal” message. Many display issues come down to bad connections, especially with older VGA or frayed HDMI cords.
Try replacing the current cable or plugging it into another output port, such as switching from HDMI to DisplayPort. Testing different combinations can quickly show which part is failing. Even slightly bent pins on a VGA connector can cut off the signal completely.
Quick tip: If one display input works but another doesn’t, stick with the stable option until you can troubleshoot further. This process is also described in the TechCult article on monitor display problems.
Cleaning dusty connectors, reseating cables firmly, and restarting the monitor can also restore a signal instantly. A methodical approach like this prevents replacing parts that still work fine.
Deep Dive into Hardware: Graphics Cards, RAM, and POST

When a monitor stays dark after pressing the power button, the issue often sits within a few key parts—graphics processing, memory, or boot diagnostics. Each plays a vital role in turning stored data into the picture you expect to see on screen.
Check Graphics Card Placement and Connections
A poorly seated graphics card is a common reason a computer screen won’t display anything. Users should first ensure the dedicated graphics card is firmly inserted in its PCIe slot. Even a small tilt or incomplete connection can cause a hardware malfunction.
If the system has both integrated and dedicated graphics, connecting the monitor to the wrong output port blocks the video signal. Users should attach the cable to the GPU’s video port, not the motherboard’s.
It helps to run through a quick checklist:
- Check power connectors: Many modern GPUs need one or two 6- or 8-pin connectors from the power supply.
- Verify cables: Try another HDMI or DisplayPort cable before assuming hardware failure.
- Inspect for dust or damage: Cleaning the slot and connector pins sometimes restores a firm contact.
If there’s still no image, testing the GPU on another system can confirm if the card itself has failed. For more details on how a computer’s visual hardware works, review this guide to graphics cards and their functions.
Reseat or Replace RAM
The RAM (Random Access Memory) helps the system load and run the operating system. Loose or faulty RAM often prevents a computer from reaching the boot stage. Turning off the power, disconnecting the cable, and then removing and reinserting each memory stick can clear temporary problems.
Mixing incompatible memory modules or using the wrong slot configuration sometimes leads to hardware issues that cause blank screens. Many motherboards require specific slots—usually labeled DIMM A2 and B2—for two-stick setups. The manual identifies these.
A quick test involves starting the PC with one stick of RAM installed at a time. If it displays with one stick but not the other, the bad module is easy to pinpoint.
| RAM Problem | Likely Cause | Fix |
|---|---|---|
| No display or beeps | Mis-seated stick | Reseat memory |
| Random freezes | Failing module | Replace RAM |
| Only partial memory detected | Wrong slot usage | Adjust slot placement |
The system’s Device Manager can later confirm if all memory is recognized once the computer boots.
Listen for POST Beeps and LED Indicators
When the screen shows nothing, Power-On Self-Test (POST) signals can be invaluable. POST runs automatically every time a computer starts to ensure each major component works. Most motherboards use a system of beeps or onboard LEDs to pinpoint hardware failure before visuals appear.
A single short beep generally means the system passed the POST. Multiple long or repeating beeps often indicate errors such as missing RAM or an unpowered GPU.
Many modern boards now include LED codes near the CPU or memory slots. The LEDs may glow red, yellow, or white to represent specific problems. Checking the motherboard manual helps decode which light corresponds to what.
If there are no sounds or lights at all, the PSU or motherboard may be at fault. In that case, further testing or professional help may be necessary to identify the hardware malfunction.
Test with Minimal Hardware Setup
Stripping the system down to its essentials can isolate the problem. This “minimal setup” uses only the CPU, one RAM stick, and the power supply—leaving the system otherwise bare. If the computer successfully completes POST with this setup, one of the removed parts is the likely culprit.
Reinstalling each component one at a time helps reveal the exact failure point. Technicians often start with the graphics card, followed by storage drives and peripheral devices.
A brief checklist for this process:
- Unplug everything except CPU, RAM, and PSU.
- Power on and listen for POST feedback.
- Reinstall one component at a time until the display returns.
If even the bare-minimum configuration doesn’t produce signs of life, deeper motherboard or PSU testing is required. In this stage, checking the system’s boot order and ensuring the BIOS detects all devices can prevent wasted effort on external causes.
When Software Strikes: BIOS, Safe Mode, and Graphics Drivers

A blank screen can sometimes mean the computer itself is fine, but the system settings or drivers got tangled up. Problems in the BIOS, Safe Mode, graphics drivers, or even Windows updates can cause the display to stop responding. Getting things back on track usually involves resetting configurations, updating key components, and isolating the cause of the failure.
Reset BIOS Settings and Update BIOS
If the screen stays black after startup, the BIOS might be misconfigured. Restoring default BIOS settings can help the computer detect hardware properly again. To do this, restart the computer, enter the BIOS setup (often by pressing F2, DEL, or ESC during startup), and select Load Setup Defaults.
Outdated firmware can also block your display. A BIOS update improves compatibility with newer graphics cards and monitors. Most manufacturers offer official update tools on their websites. Always match the update version to your exact motherboard model to avoid system errors.
A few key steps for safe BIOS work:
- Back up important files before changes
- Use a stable power source when updating
- Never turn off the device during installation
Resetting and updating the BIOS ensures your Windows PC loads hardware instructions cleanly and can detect the display adapter again.
Boot in Safe Mode and Troubleshoot Drivers
If the BIOS loads fine but the screen still won’t show Windows properly, Safe Mode is your lifeline. This mode loads only the essential drivers, helping pinpoint conflicts that stop normal startup. Restart your PC and enter Safe Mode from the recovery options or through the BIOS.
You can also try booting into Safe Mode from the BIOS in Windows 11 if Windows refuses to start.
Two main Safe Mode types:
| Mode | Description |
|---|---|
| Minimal (Standard) | Loads Windows with basic drivers and no network access. |
| Safe Mode with Networking | Adds network drivers to let you download updates or new drivers. |
In Safe Mode, uninstall recent updates, roll back to a previous display driver, or perform a System Restore. This controlled environment helps identify whether startup problems come from faulty drivers or conflicting software.
Update or Reinstall Graphics Drivers
A display that won’t light up after the logo often points to outdated or corrupted graphics drivers. Use Device Manager to see if your driver failed to load. If you can open Safe Mode, uninstall the driver and restart. Windows will install a basic one automatically.
For a cleaner fix, use a utility like DDU (Display Driver Uninstaller) to remove leftover files before installing the latest graphics driver from NVIDIA, AMD, or Intel.
Keeping drivers current prevents black screens, flickering, and poor resolution.
Quick driver checklist:
- Download installers from official vendor pages
- Match the version to your operating system
- Reboot after every installation
Regular update graphics driver maintenance solves many “no signal” mysteries.
Troubleshoot Software Conflicts and Windows Update
Sometimes a new app, antivirus, or Windows Update breaks display communication. Software conflicts can damage driver links or alter display configuration files. The fix is often as simple as uninstalling the latest program or update.
Press Win + X, open Windows Update, and review the update history. Uninstall the last patch if the screen failure started soon after it.
If that doesn’t help, run System Restore or reinstall the problematic software after checking compatibility.
Tips for reducing software conflicts:
- Pause automatic updates before major work projects
- Set restore points before system changes
- Keep hardware utilities and drivers up to date
For persistent boot issues, resources like this guide to fixing system errors in Windows Safe Mode explain how to repair startup errors without interference from other programs.
Final Moves: Hard Resets, Peripherals, and Professional Help

By now, readers have probably checked cables, power, and display settings. If the computer screen still shows no picture, the next steps involve clearing out built‑up power, trimming down external clutter, and seeking trustworthy repair or data recovery help. These actions often fix tough computer screen issues when nothing else does.
Perform a Hard Reset
A hard reset drains leftover electrical charge and forces the system to restart cleanly. This can fix display issues like screen flickering, color distortion, or a laptop that powers on but shows no image.
Follow these basic steps:
- Turn off the computer.
- Unplug the power cord. If it’s a laptop, remove the battery if possible.
- Disconnect all external devices.
- Hold the power button for about 15–20 seconds.
- Reconnect power and turn it on again.
Performing a hard reset helps remove static build‑up in the motherboard capacitors. To avoid repeating the process often, keep the computer area free of dust and ensure airflow around it. Users can check detailed guidance on performing a hard reset on Windows 11 PCs for models that show no display.
| Symptom | Why It Helps |
|---|---|
| No display at startup | Clears residual charge interfering with boot |
| Random shutdowns | Re‑establishes basic power delivery |
| Screen flickering | Resets hardware timing temporarily affected by power surges |
Disconnect Peripherals
Peripherals like webcams, USB drives, or external monitors can trigger start‑up or display problems. When a device conflicts with startup commands, it can stop the main screen from activating.
Start by unplugging everything except the keyboard, mouse, and display cable. Restart the PC and note any changes. If the picture returns, reconnect devices one by one to find the troublemaker.
Common culprits include damaged USB hubs, outdated drivers, and faulty external hard drives. Using manufacturer tools such as Dell’s SupportAssist can help test these connections. This simple isolation approach is often enough to fix computer screen issues without deeper hardware work — and it costs nothing but a bit of patience.
Check for Data Recovery Options
If the display remains blank after power resets and device checks, users may worry about losing important files. Data is often still safe even if the display fails. Services like Secure Data Recovery’s troubleshooting guide explain that a system can appear dead while the drives remain fully intact.
Try connecting the hard drive to another computer or using an external enclosure. If the drive appears there, copy essential files immediately. Many repair tools and Windows utilities can scan the disk for errors or retrieve usable data.
When attempting recovery, avoid using damaged drives repeatedly. Doing so can make professional recovery harder later. Backing up photos, school work, and business documents regularly remains the easiest prevention against future data loss.
Contact Professional Repair Services
Sometimes it’s smarter — and safer — to stop guessing and call a qualified technician. Persistent display issues, motherboard faults, or internal connector problems need hands‑on inspection. A local technician or the manufacturer’s repair center can run diagnostic tests that regular users can’t perform at home.
Costs vary, but many shops offer free or low‑cost evaluations. Laptop owners can contact OEM repair programs or certified partners that support the brand. If the issue involves both hardware and critical data, a data recovery company can inspect drives while keeping digital privacy intact.
When in doubt, bring the machine and describe every symptom clearly — when the black screen started, what lights appear, and what noises occur during boot. Providing those details helps technicians identify whether the issue lies in the graphics card, display cable, or something more serious.